Award Winning Marquee Animation with Framer Motion
Have you ever wondered, how do they create such smooth and beautiful animations in their site ? Worry not, in this article i will be guiding you through how you can create such amazing award winning effects..
Here is what we will be creating Visit Demo
Without wasting any time , let's get started,
I am using nextjs for this you can choose react or whatever you prefer..
╰─ npx create-next-app@latest park --tailwind
Add these packages in your package.json
 "dependencies": {
    "@react-hook/window-size": "^3.1.1",  // to get the size of window
    "framer-motion": "^11.0.8", // to animate our elements
    "normalize-wheel": "^1.0.1", // to normalize the wheel scroll details
    "react-use": "^17.5.0" // to use useRafLoop to render stuff
  }
don't forget to run npm install to install these packages.
let's clear the boilerplate and add the constants which we will be using in page.jsx
"use client";

const _ = {
  speed: 1,
  threshold: 0.014,
  wheelFactor: 1.25,
  dragFactor: 1.2,
};

const data = [
  {
    image:
      "https://framerusercontent.com/images/VIqlDWL1UV6azfAV9xBz0MPhw.jpeg?scale-down-to=1024",
    title: "Petrified Forest",
  },
  {
    image:
      "https://framerusercontent.com/images/L1RFqeJ6NviUiTVLT3u2pL6IU.jpeg?scale-down-to=1024",
    title: "Mountain Valley",
  },
  {
    image:
      "https://framerusercontent.com/images/Q44lHbttA8VG6mS9allIhkYAR8Y.jpeg?scale-down-to=1024",
    title: "Cannon Beach",
  },
  {
    image:
      "https://framerusercontent.com/images/3LKCYdYAgamssbz1JJSOnu8vM.jpg?scale-down-to=1024",
    title: "Redwood",
  },
  {
    image:
      "https://framerusercontent.com/images/NcLJHjVnMgsxeBqzuinazFIEXoc.jpg?scale-down-to=1024",
    title: "Brookings",
  },
];

const data3 = [
  {
    image:
      "https://framerusercontent.com/images/CzfcVySzXAvy0AuiJGpGMtrpus.jpeg?scale-down-to=512",
    title: "Zion",
  },
  {
    image:
      "https://framerusercontent.com/images/I6xwwDpEjzsZzRHm0K43uSBUTFw.jpeg?scale-down-to=1024",
    title: "Saguro",
  },
  {
    image:
      "https://framerusercontent.com/images/xzKVdjf3wAmhNYnOArbE2UDgm8.jpeg?scale-down-to=1024",
    title: "Josha Tree",
  },
  {
    image:
      "https://framerusercontent.com/images/Q44lHbttA8VG6mS9allIhkYAR8Y.jpeg?scale-down-to=1024",
    title: "Cannon Beach",
  },
  {
    image:
      "https://framerusercontent.com/images/q7JcwecvpKTVhzSu8X3xeEJUmM.jpg?scale-down-to=1024",
    title: "Grand Teton",
  },
];

const data2 = [
  {
    image:
      "https://framerusercontent.com/images/hTsiS6tZ2GARqbwWY5dIUHGtcU.jpeg?scale-down-to=1024",
    title: "Yosemite",
  },
  {
    image:
      "https://framerusercontent.com/images/gLC4I3K6WZDH2d8LImM944p2oVw.jpeg?scale-down-to=1024",
    title: "Catalina",
  },
  {
    image:
      "https://framerusercontent.com/images/fJDYXXbxmLW7qi3QCMfWXJRvPc.jpeg?scale-down-to=1024",
    title: "Great Sand Dunes",
  },
  {
    image:
      "https://framerusercontent.com/images/xzKVdjf3wAmhNYnOArbE2UDgm8.jpeg?scale-down-to=1024",
    title: "Sedona",
  },
  {
    image:
      "https://framerusercontent.com/images/NSExEw4QIpuVtifFprhP3QxjY.jpeg?scale-down-to=1024",
    title: "Morro Bay",
  },
];

const data4 = [
  {
    image: "https://www.touropia.com/gfx/b/2020/09/badlands.jpg",
    title: "Badlands",
  },
  {
    image: "https://www.touropia.com/gfx/b/2020/09/niagara_falls.jpg",
    title: "Niagara Falls",
  },
  {
    image: "https://www.touropia.com/gfx/b/2020/09/big_sur.jpg",
    title: "Big Sur",
  },
  {
    image: "https://www.touropia.com/gfx/b/2020/09/florida_keys.jpg",
    title: "Florida Keys",
  },
  {
    image: "https://www.touropia.com/gfx/b/2020/09/manhattan.jpg",
    title: "Manhattan",
  },
];

export default function Home() {
  return (
    <main className="flex flex-col max-w-screen overflow-x-hidden items-center text-center">
      {/* We will be adding content here  */}
    </main>
  );
}
now what are we going to do is to add some content in our code so it shows up.
<main className="flex flex-col max-w-screen overflow-x-hidden items-center text-center">
{Array.from({ length: 1 }).map((item, index) => (
<div
className="h-screen text-[5rem] text-white font-thin w-full flex items-center justify-center bg-black"
key={index}
>
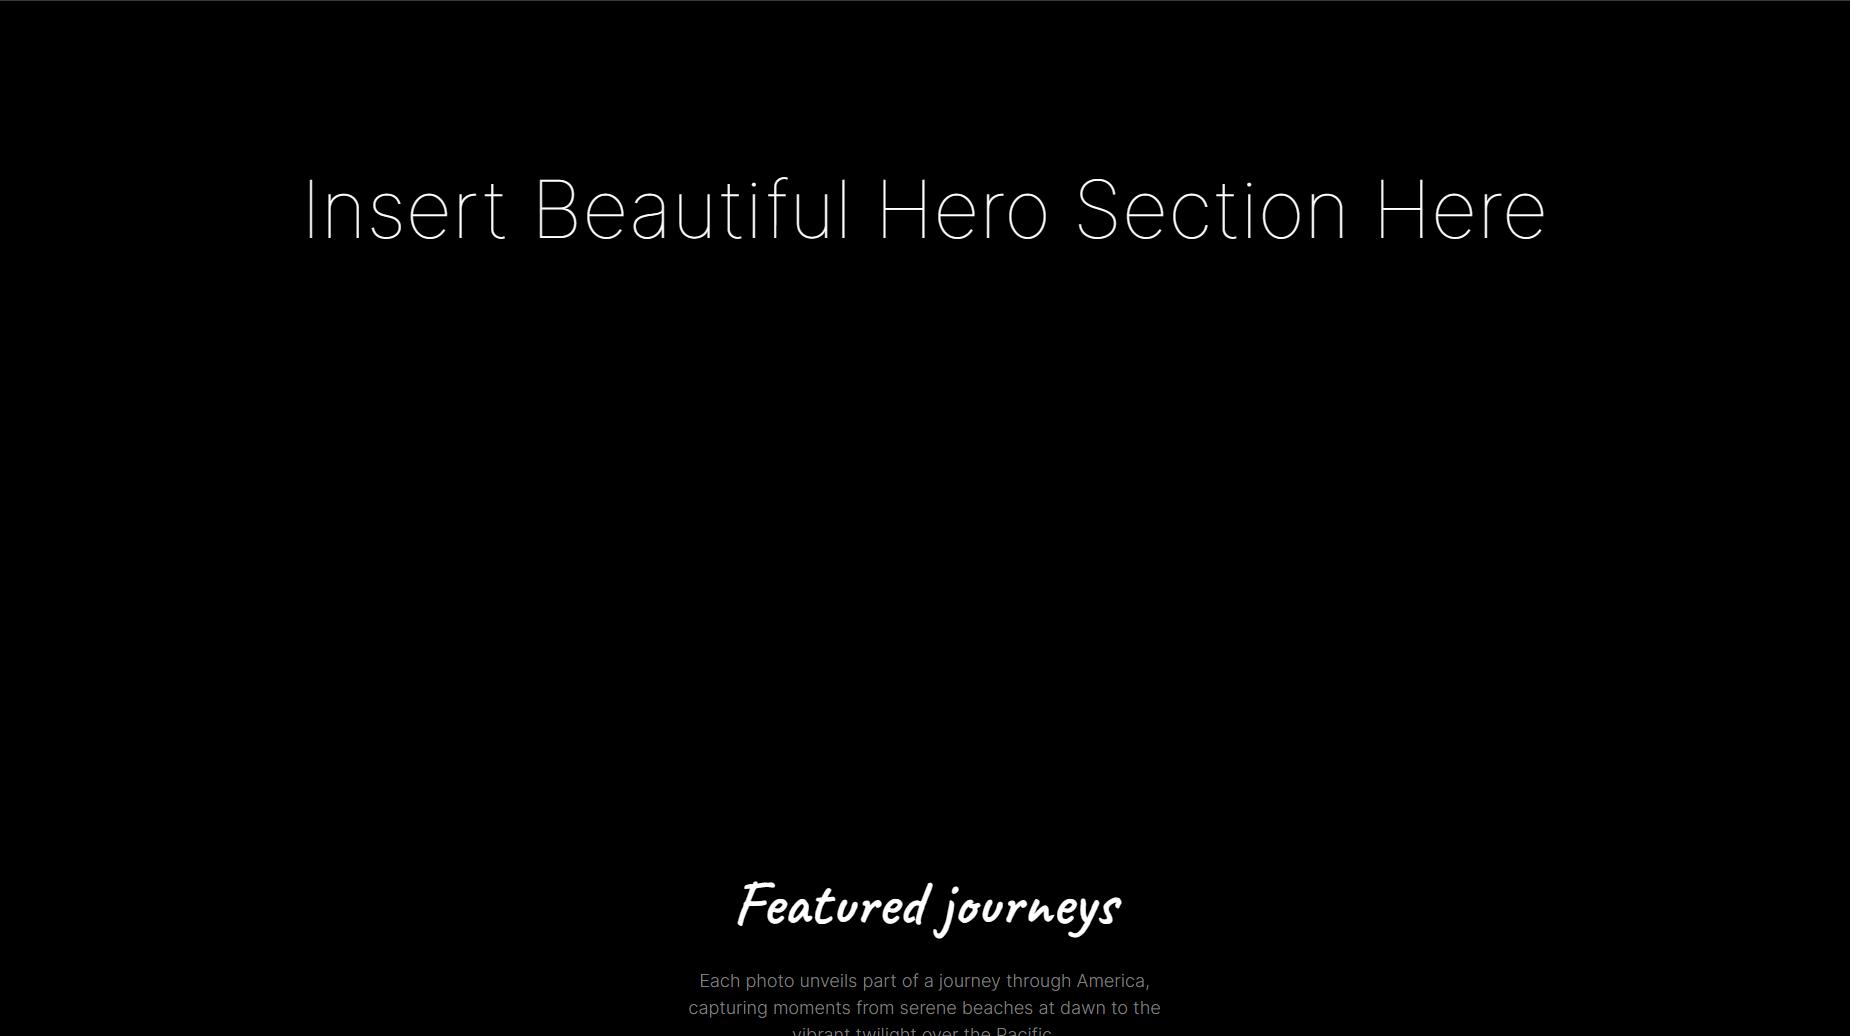
Insert Beautiful Hero Section Here
</div>
))}
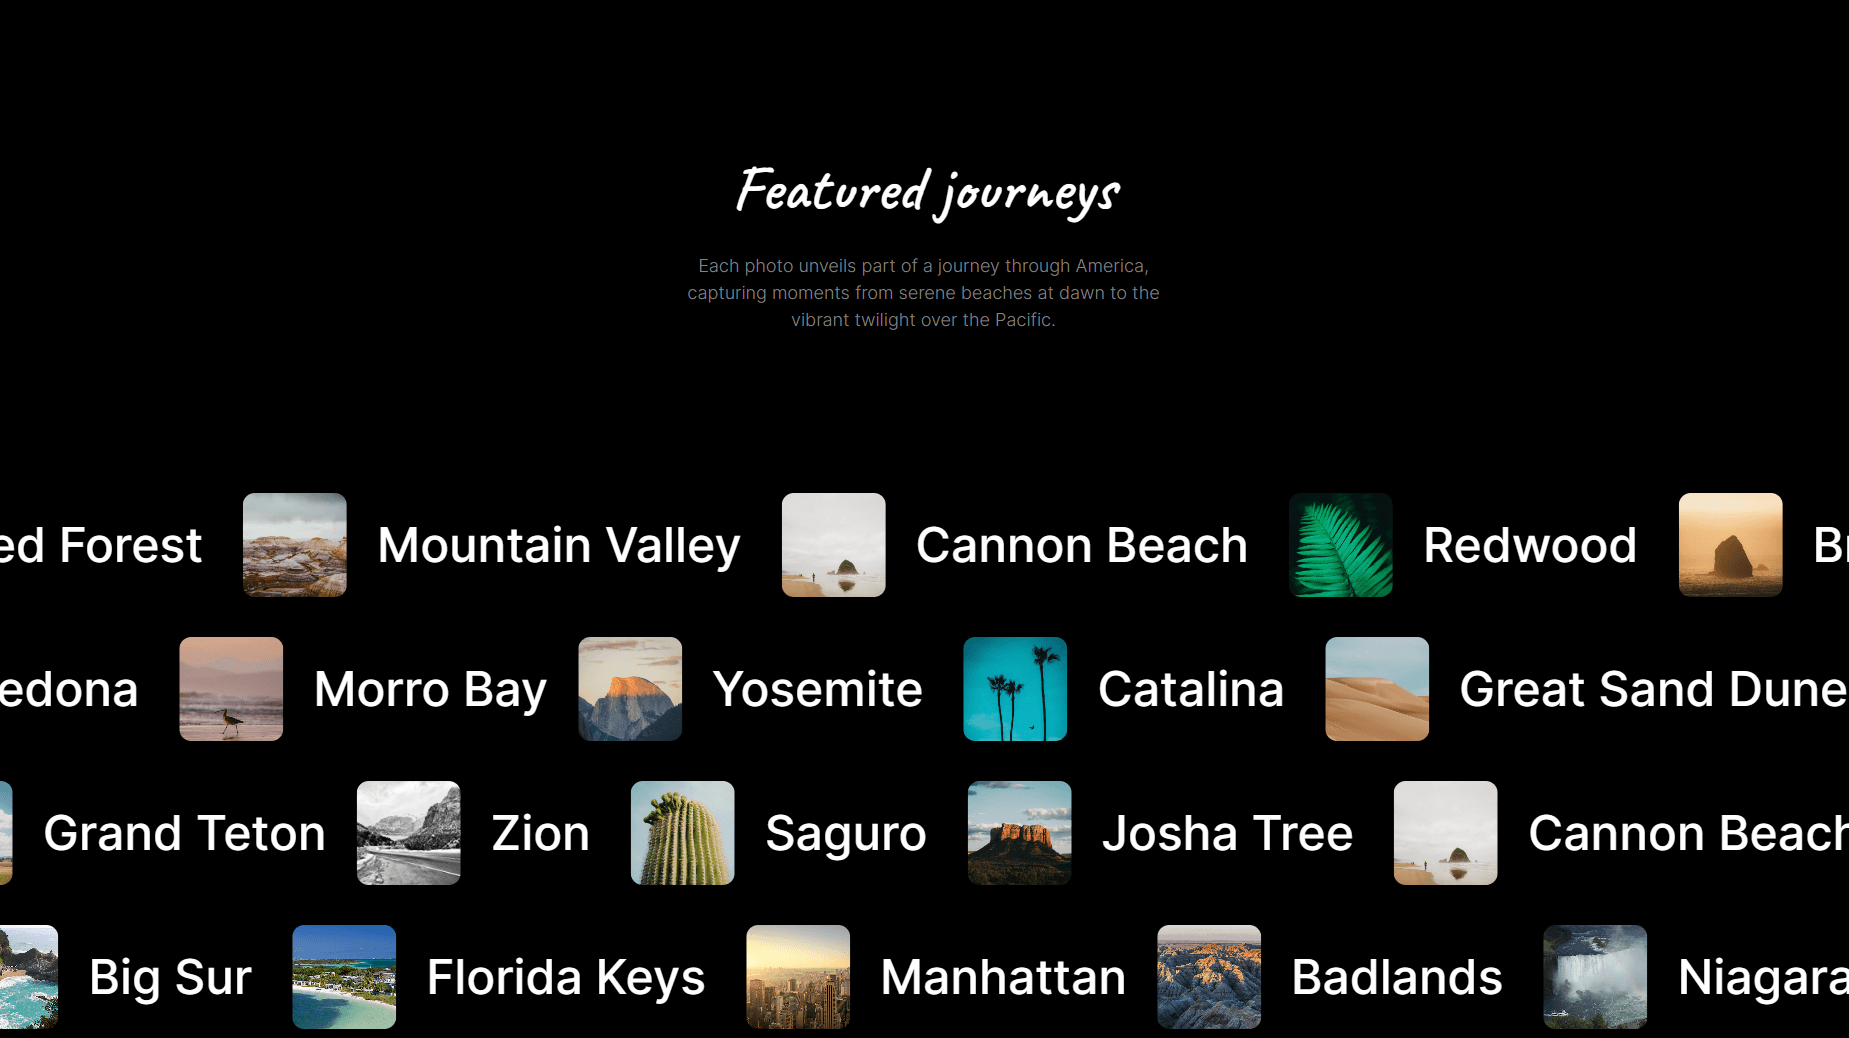
<div className="flex items-center justify-center flex-col gap-4 mt-[8rem] text-[4rem] max-w-[500px] font-semibold ">
<span className="text-[64px] text-white font-cavet">
Featured journeys
</span>
<span className="text-[18px] text-[#808080] font-light">
Each photo unveils part of a journey through America, capturing
moments from serene beaches at dawn to the vibrant twilight over the
Pacific.
</span>
</div>
{Array.from({ length: 2 }).map((item, index) => (
<div
className="h-screen text-[6rem] text-white font-thin w-full flex items-center justify-center bg-black"
key={index}
>
Another Section
</div>
))}
</main>
it will look like this
now let's listen to mouse wheel or scroll, so for that i am going to create a ref named x and a function named onWheel , and i am going to use normalizeWheel function which i will be importing from normalizeWheel package to get the value in formatted way and store that value in our x reference after multiplying by wheel factor.
const x = useRef(0);

  const onWheel = (e) => {
    const normalized = normalizeWheel(e);
    x.current = normalized.pixelY * _.wheelFactor;
  };
  return (
    <main
      className="flex flex-col max-w-screen overflow-x-hidden items-center text-center"
      onWheel={onWheel}
    >
now we have our scrolling speed stored in x.current and whenever we scroll, it updates, and it doesn't cause any render cause reference doesn't cause re-renders in react.
now let's create two more components, either in same file or you can create separate file also i will be creating them in same file to have the all code at one place.
const MarqueeContainer = () => {
  return <div className="flex gap-[30px]"></div>;
};

const MarqueeItem = () => {
  return (
    <div className="shrink-0 flex gap-[40px] items-center  text-white  whitespace-nowrap"></div>
  );
};
i have added some basic styling to it, which you can understand by going through the code.
const MarqueeContainer = ({x, direction, springDetails, cardData}) => {
 var initialValue = _.speed;
  if (direction === "right") {
    initialValue *= -1;
  }

  const speed = useSpring(initialValue, springDetails);

  const loop = () => {
    if (Math.abs(x.current) < _.threshold) return; // to preserver a minimum speed

    x.current *= 0.66; // so we gradiuallly decrease the speed to a threshold other wise it will infinitley speed

    if (direction === "right") {
      speed.set((_.speed + x.current) * -1);
    } else {
      speed.set(_.speed + x.current);
    }
  };

  useRafLoop(loop, true);
  return <div className="flex gap-[30px]"></div>;
};
In MarqueeContainer , i have added some props named direction , springDetails and x, we will be using direction to control the direction of animation, springDetails will contain details regarding the springAnimations which we will pass during initialization of MarqueeContainer , x will contain our reference to speed and cardData is just data for rendering the card component which we will create later on.
in first few lines, i am checking the direction, and if it is in right, then i am multiplying it with -1 to make it in opposite direction.
const speed = useSpring(initialValue, springDetails );
in this line , i am using useSpring hook from framer-motion , to create a speed motion values which we will be using to control the speed of our MarqueeItem. you can read more about useSpring hook here.
Here is how MarqueeContainer intilization will look like at the moment.
<MarqueeContainer
    x={x}
    direction={"left"}
    springDetails={{ damping: 200, stiffness: 1000, mass: 1 }}
    cardData={data}
 />
damping is the opposing force, and stiffness is how quickly we want our changes to show. mass is just mass we define for our elements, which will be used in their internal calculations to control the animations.
const loop = () => {
    if (Math.abs(x.current) < _.threshold) return; // to preserver a minimum speed

    x.current *= 0.66; // so we gradiuallly decrease the speed to a threshold other wise it will infinitley speed

    if (direction === "right") {
      speed.set((_.speed + x.current) * -1);
    } else {
      speed.set(_.speed + x.current);
    }
  };
in the loop function, firstly i am checking the current speed , if it is less than threshold then i am not doing anything and returing it.
if it is greater than our threshold then i am mutiplying it 0.66 and storing it , so it doesn't just keep increasing.
now i setting the speed to x.current + our initial speed , and if direction is right so multiplying it by -1, so we get a reverse animation.
useRafLoop(loop, true);
in last line i am just calling this loop again and again so it keeps updating the value. i am using useRafLoop hook from react-use.
now let's create our MarqueeItem and pass down the speed which we have been storing in speed variable.
const MarqueeItem = ({ children, speed }) => {
  const item = useRef(null);
  const rect = useRef({});
  const x = useRef(0);

  const [width, height] = useWindowSize();

  const setX = () => {
    if (!item.current || !rect.current) return;

    var xPercentage = (x.current / rect.current.width) * 100;
    if (xPercentage < -100) x.current = 0;
    if (xPercentage > 0) x.current = -rect.current.width;

    item.current.style.transform = `translate3d(${xPercentage}%, 0, 0)`;
  };

  useEffect(() => {
    rect.current = item.current.getBoundingClientRect();
  }, [width, height]);

  const loop = (e) => {
    x.current -= speed.get();
    setX();
  };

  useRafLoop(loop, true);

  return (
    <div
      className="item shrink-0 flex gap-[40px] items-center  text-white  whitespace-nowrap"
      ref={item}
    >
      {children}
    </div>
  );
};
now in first few lines, i have initialized some variables using useRef hook, so it doesn't cause re-render when we update our variables.
const item = useRef(null);
const rect = useRef({});
const x = useRef(0);
const [width, height] = useWindowSize();
here, item will be used as a reference to our MarqueeItemdiv, i am using rect to store the width and height of our item div, here i am defined another x variable in which we will be storing current location of MarqueeItem.
we have declared two more variable named width and height, from useWindowSize hook, which i have imported from @react-hook/window-size .
const setX = () => {
    if (!item.current || !rect.current) return;

    var xPercentage = (x.current / rect.current.width) * 100;
    if (xPercentage < -100) x.current = 0;
    if (xPercentage > 0) x.current = -rect.current.width;

    item.current.style.transform = `translate3d(${xPercentage}%, 0, 0)`;
  };
In the setX function , firstly i am checking if our item ref has any element or not.
and in xPercentage variable, i am storing how much we will need to shift our Marquee item in x direction. you can play around with formula which you like, but what i am doing here to calculate is, getting the current location by x.current , diving it by the width of our container and multiplying it by 100,
if (xPercentage < -100) x.current = 0; , if the calculated xPercetage is less than -100 , then it has moved out of the screen to the left so update the current location to 0 by doing x.current = 0.
if (xPercentage > 0) x.current = -rect.current.width; , If the calculated xPercentage is greater than 0 , the item has scrolled out of view to the right, x.current is updated to the negative value of the item's width, so it wraps around to the left side.
now we are just updating the MarqueeItem using style transform, we are using translate3d for better performance, as it leverage GPU acceleration.
useEffect(() => {
    rect.current = item.current.getBoundingClientRect();
  }, [width, height]);
I have just added a useEffect with dependencies of width and height so whenever screen width, height changes we update the rect.current also.
 const loop = (e) => {
    x.current -= speed.get();
    setX();
  };
  useRafLoop(loop, true);
in loop function , I am subtracting the speed value from x.current, this will update the MarqueeItem container position based on speed. and after updating the x.current we are calling setX function so it reflects the changes. and we are calling it continuously using useRafLoop hook.
now let's create a card component which will have the image and text,

const Card = ({ item }) => {
  return (
    <div className="flex pointer-events-none   shrink-0 justify-center items-center gap-[30px]">
      <div className="max-h-[104px] rounded-xl relative max-w-[104px] overflow-clip ">
        <img
          alt={item.title}
          src={item.image}
          className="  h-full w-full min-h-[104px] min-w-[104px] object-cover object-center"
        />
      </div>
      <span className="text-[3rem] font-medium w-full whitespace-nowrap">
        {item.title}
      </span>
    </div>
  );
};
let's go over it again,
add this to render our MarqueeContainer in our Page
<div className="mt-[10rem]">
        <MarqueeContainr
          x={x}
          direction={"left"}
          springDetails={{ damping: 200, stiffness: 1000, mass: 1 }}
          cardData={data}
        />
</div>
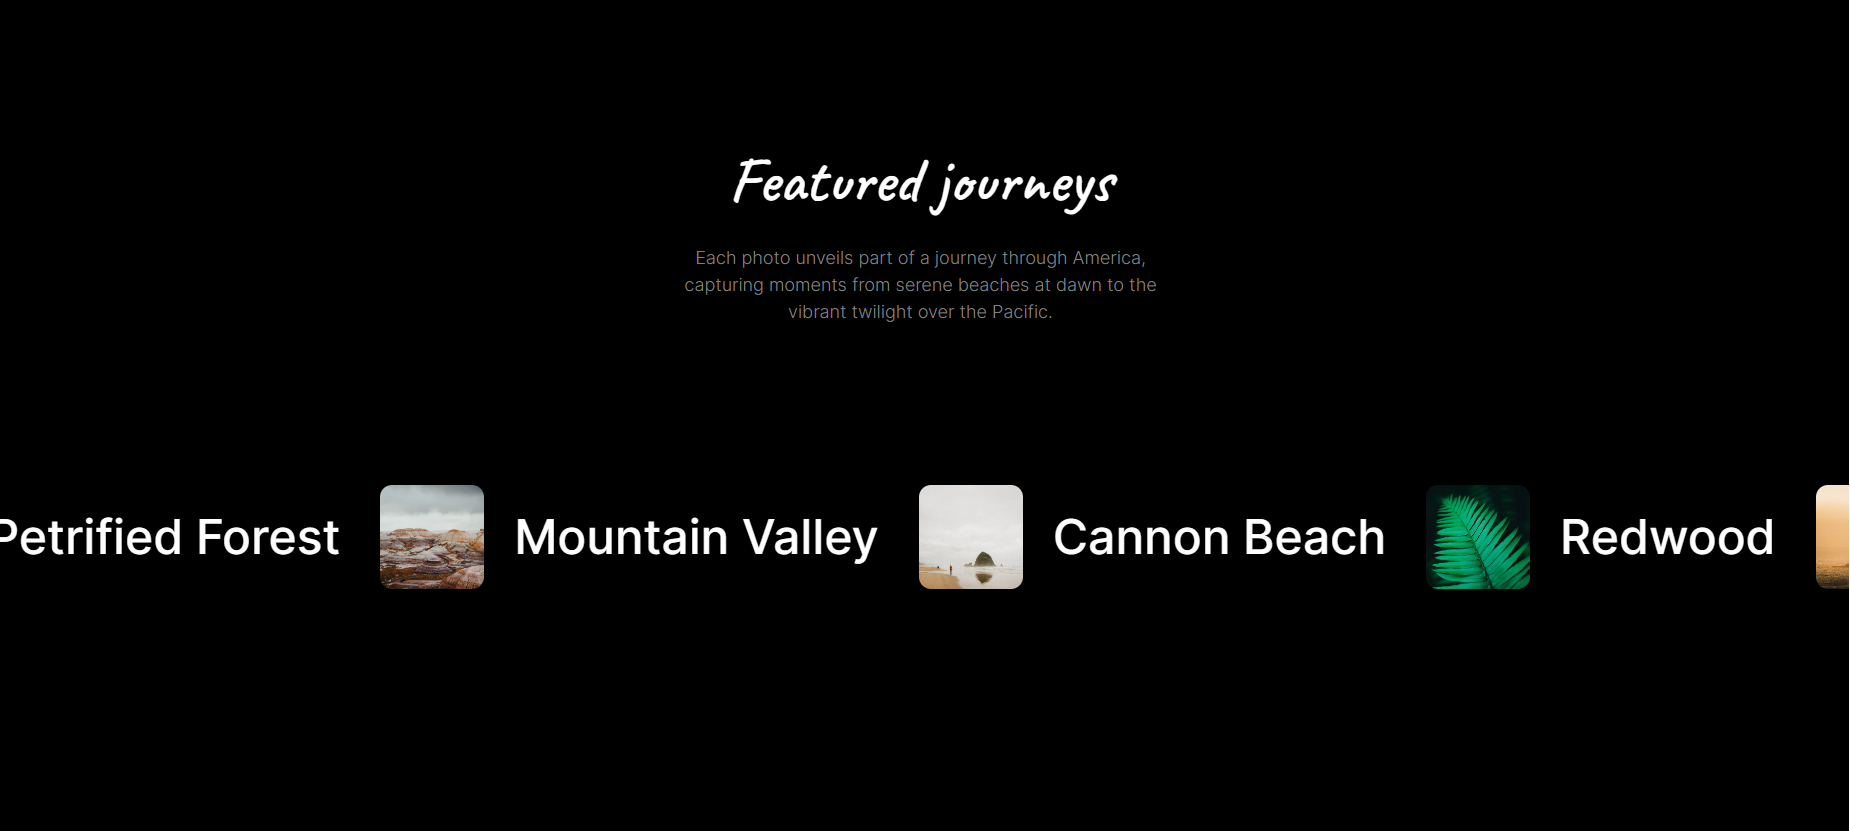
now in our MarqueeContainer , add this , this will render the components four time to dont leave any gap. i have also made this motion.div element , i have imported motion from framer-motion , this is just how framer motion work, whatever element which we want to animate we can just make it a motion element.
 <motion.div
        className="flex gap-[30px]"
      >
        <MarqueeItem speed={speed}>
          {cardData.map((item, index) => (
            <Card key={index} item={item} />
          ))}
        </MarqueeItem>
        <MarqueeItem speed={speed}>
          {cardData.map((item, index) => (
            <Card key={index} item={item} />
          ))}
        </MarqueeItem>
        <MarqueeItem speed={speed}>
          {cardData.map((item, index) => (
            <Card key={index} item={item} />
          ))}
        </MarqueeItem>{" "}
        <MarqueeItem speed={speed}>
          {cardData.map((item, index) => (
            <Card key={index} item={item} />
          ))}
        </MarqueeItem>
</motion.div>
currently it will look like this ,
to add more rows, we can just multiple MarqueeContainer , but keep in mind, you need to create a new variable using useRef , which will store the speed of that MarqueeContainer in that , if you will pass the current x , then every instance will have the same speed,
here is how to add multiple rows,
const x = useRef(0);
  const x2 = useRef(0);
  const x3 = useRef(0);
  const x4 = useRef(0);

  const onWheel = (e) => {
    const normalized = normalizeWheel(e);
    x.current = normalized.pixelY * _.wheelFactor;
    x2.current = normalized.pixelY * _.wheelFactor;
    x3.current = normalized.pixelY * _.wheelFactor;
    x4.current = normalized.pixelY * _.wheelFactor;
  };
 <div className="mt-[10rem] flex flex-col gap-[30px]">
        <MarqueeContainer
          x={x}
          direction={"left"}
          springDetails={{ damping: 200, stiffness: 1000, mass: 1 }}
          cardData={data}
        />
        <MarqueeContainer
          x={x2}
          direction={"right"}
          springDetails={{ damping: 200, stiffness: 1000, mass: 1 }}
          cardData={data2}
        />
        <MarqueeContainer
          x={x3}
          direction={"left"}
          springDetails={{ damping: 200, stiffness: 1000, mass: 1 }}
          cardData={data3}
        />
        <MarqueeContainer
          x={x4}
          direction={"right"}
          springDetails={{ damping: 200, stiffness: 1000, mass: 1 }}
          cardData={data4}
        />
      </div>
you can play around with damping and stiffness and mass of each MarqueeContainer instance so every row will have some other effects.
I have added some more effects like dragging and moving , slowdown , and a lot more , so you can checkout the github repo if you are interested in adding some more effects.
Here is the Github Repo :- notpritam/park (github.com)
If you have any questions feel free to comment...